Image Filtering in Python Using Pillow
Image filtering is the process of modifying or enhancing an image. It can be used to enhance some features (edges) of an image or it can even remove some features of an image. Image filtering can involve steps like smoothing, sharpening, edge enhancement, edge detection, noise removal, etc. Image filtering can be the last step in image processing where the output of image filtering is an expected image or it can be even an intermediate step where the filtered image might be used by another thing like machine learning. Python has libraries like a pillow, scikit-image, OpenCV, scipy, etc. As a part of this tutorial, we'll explain how we can use PILLOW for image filtering. Pillow has a list of predefined image filtering functions that can make our task of image filtering quite easy. We'll explain individual filters with examples.
There are two kinds of filters available with the pillow. Few are non-parameterized and others are parameterized filters. The parameterized filters let us modify the properties of filters by providing different values of parameters. All filters are available through ImageFilter module of the pillow.
Below is a list of non-parameterized filters.
- BLUR
- CONTOUR
- DETAIL
- EDGE_ENHANCE
- EDGE_ENHANCE_MORE
- EMBOSS
- FIND_EDGES
- SHARPEN
- SMOOTH
- SMOOTH_MORE
Below is a list of parameterized filters.
- BoxBlur
- GaussianBlur
- UnsharpMask
- Kernel
- RankFilter
- MedianFilter
- MinFilter
- MaxFilter
The process of applying filters is very simple with a pillow. It involves simple steps.
- Load an image
- Create Filter
- Call filter() method on an image by giving it filter instance.
The output of the last step will be a filtered image.
We'll start by importing the necessary modules.
from PIL import Image
from PIL import ImageFilter
Below we have loaded two images that will be used for explaining the usage of various filters.
home_png = Image.open("home_main_mob.png")
home_png

dr_kalam = Image.open("dr_apj_kalam.jpeg")

dr_kalam

BLUR Filter
The BLUR filter convolves below mentioned 5x5 kernel on the original image in order to generate a blurred image.
[[1, 1, 1, 1, 1,],
 [1, 0, 0, 0, 1,],
 [1, 0, 0, 0, 1,],
 [1, 0, 0, 0, 1,],
 [1, 1, 1, 1, 1,]]
We can notice from the above kernel that when this kernel is convolved around the image it'll only take all edge pixels of the kernel and all intermediate pixels will be ignored. This will result in making the image blur as we'll lose some data.
Below we have explained the impact of the BLUR filter on our images.
home_png.filter(ImageFilter.BLUR)

dr_kalam.filter(ImageFilter.BLUR)
BoxBlur Filter
BoxBlur is a parameterized filter that has one parameter named radius. The radius accepts an integer as well as float values. It'll loop through all pixels of an image and take an average of pixels that come in a radius specified by the parameter. If we specify the radius of 1 then a pixel can have 9 surrounding pixels and an average of that will be taken and assigned a new value of the pixel. Please make a note that edge pixels will have fewer neighbors.
Below we have tried our images with a radius of 2 which will take all neighbors that come in a 2-pixel radius and take an average of them as the final value.
Please make a note that we are using display() functionality of IPython to combine all images and display them. If you are interested in learning about how to display contents of different types in jupyter notebook then please feel free to check our tutorial on the same.
from IPython import display

blurred_home = home_png.filter(ImageFilter.BoxBlur(radius=2))
blurred_kalam = dr_kalam.filter(ImageFilter.BoxBlur(radius=2))

display.display(blurred_home, blurred_kalam)

GaussianBlur
GaussianBlur filter is a type of image blurring filter which applies blurring to each pixel based on the Gaussian formula.

Gaussian blur is different from normal blur filters which takes the average of all neighboring pixels of a pixel means that all neighbors are assigned the same weight (the ones which are near to pixel and the ones which are a bit far). Gaussian blur assigns more weight to pixels that are nearer to pixel and less weight to those that are far. This results in less data loss compared to those simple blur filters which just take an average of neighbor pixels of an image.
GaussianBlur filter has a parameter named radius which has the same meaning as that of BoxBlur. Below we have applied GaussianBlur with different radius values to our images.
gauss_blurr_home = home_png.filter(ImageFilter.GaussianBlur(radius=2))
gauss_blurr_kalam = dr_kalam.filter(ImageFilter.GaussianBlur(radius=2))

display.display(gauss_blurr_home, gauss_blurr_kalam)

gauss_blurr_home = home_png.filter(ImageFilter.GaussianBlur(radius=3))
gauss_blurr_kalam = dr_kalam.filter(ImageFilter.GaussianBlur(radius=3))

display.display(gauss_blurr_home, gauss_blurr_kalam)

CONTOUR Filter
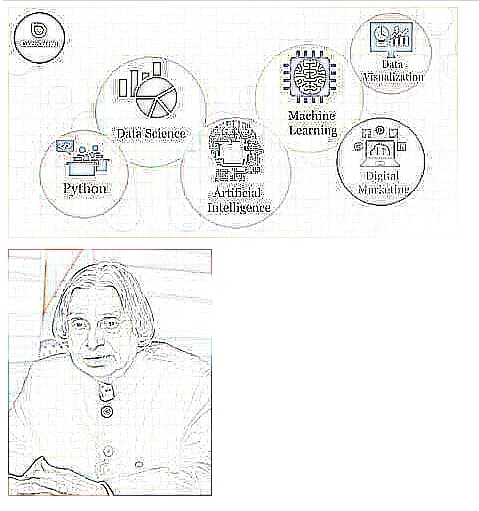
CONTOUR filter can help detect edges in an image. CONTOUR filter convolves below mentioned 3x3 kernel on our image in order to generate a filtered image. It's a non-parameterized filter.
[[-1, -1, -1,],
 [-1,  8, -1,],
 [-1, -1, -1,]]
Below we have applied the CONTOUR filter to both of our images.
contour_home = home_png.filter(ImageFilter.CONTOUR)
contour_kalam = dr_kalam.filter(ImageFilter.CONTOUR)

display.display(contour_home, contour_kalam)
DETAIL Filter
A DETAIL filter is a filter that can enhance an image. We convolve the below-mentioned 3x3 kernel to an image in order to generate a filtered image using this filter.
[[0,  -1,  0],
 [-1, 10, -1],
 [0,  -1,  0]]
This filter gives more weight to the central pixel and less weight to a surrounding pixel in order to enhance an image. Below we have generated filtered images using this filter.
detail_home = home_png.filter(ImageFilter.DETAIL)
detail_kalam = dr_kalam.filter(ImageFilter.DETAIL)

display.display(detail_home, detail_kalam)

EDGE_ENHANCE Filter
EDGE_ENHANCE filter is used to enhance the edges of an image. It convolves the below-mentioned 3x3 filter on our image in order to generated an image with enhances edges.
[[-1, -1, -1],
 [-1, 10, -1],
 [-1, -1, -1]]
Below we have applied the filter to our images to generate images with enhanced edges.
edge_enhanced_home = home_png.filter(ImageFilter.EDGE_ENHANCE)
edge_enhanced_kalam = dr_kalam.filter(ImageFilter.EDGE_ENHANCE)

display.display(edge_enhanced_home, edge_enhanced_kalam)

EDGE_ENHANCE_MORE Filter
EDGE_ENHANCE_MORE filter works almost like EDGE_ENHANCE filter but enhances edges a little more. It convolves the below-mentioned 3x3 kernel to the image.
[[-1, -1, -1],
 [-1,  9, -1],
 [-1, -1, -1]]
Please make a note that EDGE_ENHANCE_MORE has almost the same kernel as EDGE_ENHANCE with only a change in central value.
edge_enhanced_home = home_png.filter(ImageFilter.EDGE_ENHANCE_MORE)
edge_enhanced_kalam = dr_kalam.filter(ImageFilter.EDGE_ENHANCE_MORE)

display.display(edge_enhanced_home, edge_enhanced_kalam)

EMBOSS Filter
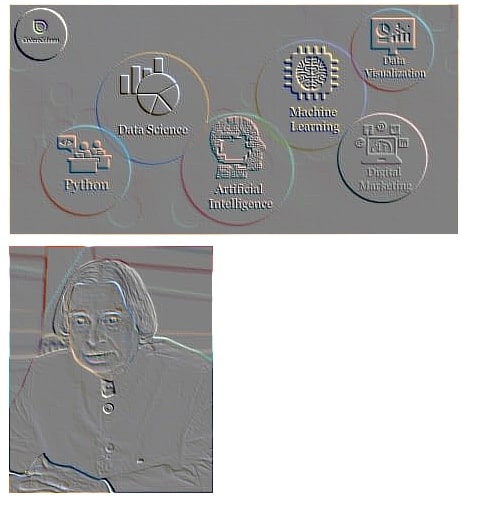
Embossing is a technique where each pixel of an image is replaced by a highlight or shadow depending on the light/dark boundaries of it. The low contrast areas of the image will become gray. A filtered image will show the rate of color change at each edge location.
EMBOSS filter available with pillow convolves below-mentioned 3x3 kernel on an original image to generate an embossed image.
[[-1, 0, 0],
 [0,  1, 0],
 [0,  0, 0]]
Below we have applied the EMBOSS filter to our images.
emboss_home = home_png.filter(ImageFilter.EMBOSS)
emboss_kalam = dr_kalam.filter(ImageFilter.EMBOSS)

display.display(emboss_home, emboss_kalam)
FIND_EDGES Filter
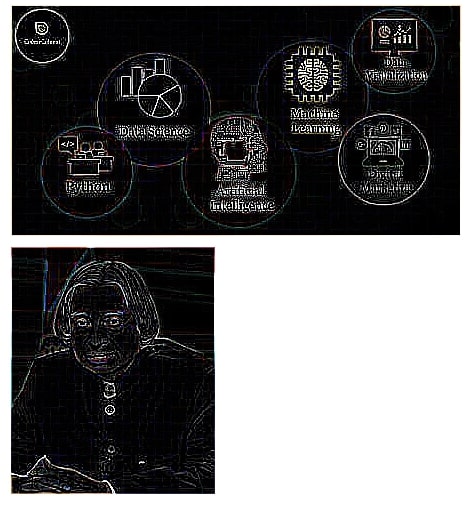
FIND_EDGES filter helps us identify an edge in an image. It convolved below mentioned 3x3 kernel on our original image in order to generate an image with edges highlighted.
[[-1, -1, -1],
 [-1,  8, -1],
 [-1, -1, -1]]
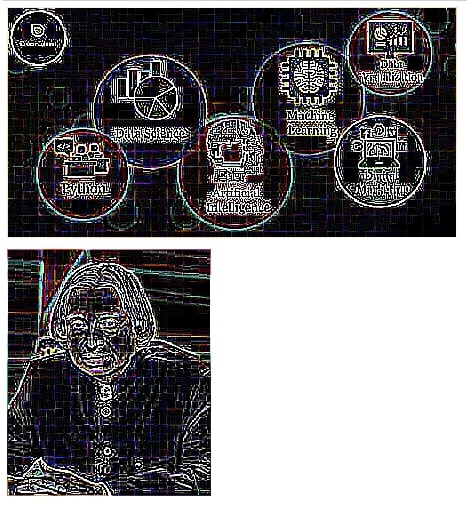
Below we have applied the filter to our images. We can see it seems to have done a good job in identifying the edges of our images.
find_edges_home = home_png.filter(ImageFilter.FIND_EDGES)
find_edges_kalam = dr_kalam.filter(ImageFilter.FIND_EDGES)

display.display(find_edges_home, find_edges_kalam)
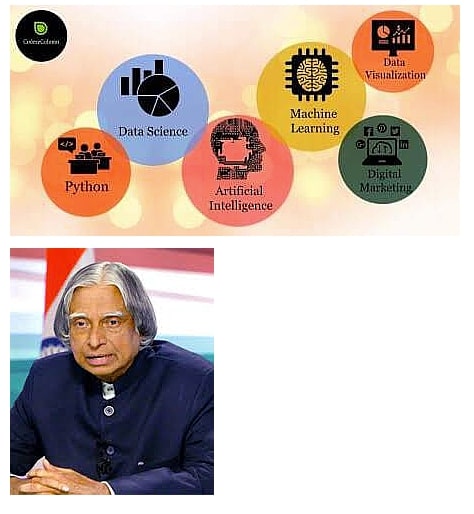
SHARPEN Filter
SHARPEN filter is used to make the edges of the image sharp in order to improve its quality. It even increases the contrast between light and dark areas of the image in order to improve the features of an image. SHARPEN filter convolves the below-mentioned 3x3 kernel on our original image in order to generate a sharpened image. Latest camera devices often sharpen the images in order to improve the quality of the image.
[[-2, -2, -2],
 [-2, 32, -2],
 [-2, -2, -2]]
sharpen_home = home_png.filter(ImageFilter.SHARPEN)
sharpen_kalam = dr_kalam.filter(ImageFilter.SHARPEN)

display.display(sharpen_home, sharpen_kalam)
SMOOTH Filter
The SMOOTH filter is used to reduce noise in data and apply the little blur. SMOOTH filter convolves the below-mentioned 3x3 kernel on our image in order to generate a smooth image.
[[1, 1, 1],
 [1, 5, 1],
 [1, 1, 1]]
smooth_home = home_png.filter(ImageFilter.SMOOTH)
smooth_kalam = dr_kalam.filter(ImageFilter.SMOOTH)

display.display(smooth_home, smooth_kalam)

SMOOTH_MORE Filter
SMOOTH_MORE filter has the same purpose as that of SMOOTH with the only difference that it applies a different kernel on the image. It convolves the below-mentioned 5x5 kernel on an image in order to smooth it.
[[1, 1,  1, 1, 1],
 [1, 5,  5, 5, 1],
 [1, 5, 44, 5, 1],
 [1, 5,  5, 5, 1],
 [1, 1,  1, 1, 1]]
smooth_more_home = home_png.filter(ImageFilter.SMOOTH_MORE)
smooth_more_kalam = dr_kalam.filter(ImageFilter.SMOOTH_MORE)

display.display(smooth_more_home, smooth_more_kalam)

UnsharpMask Filter
Unsharp mask is an image sharpening method where a blurred or an unsharp negative image is used as a mask which is combined with our original image in order to generate the final image. The resulting image is generally less blurry than the original image but a less accurate representation of the original image.
UnsharpMask filter is a parameterized filter and has the below-mentioned 3 parameters that can change the result of the filtering.
- radius - It accepts integer value specifying how many neighbor pixels to consider for the filtering process. Default value if 2.
- percent - It accepts integer specifying strength of unsharp in percentage. The default value is 150.
- threshold - It accepts integer specifying minimum brightness change that will be sharpened. The default value is 3.
Below we have applied UnsharpMask with different parameter settings to our images. Generally, value till 2 pixels for radius parameter and 50-150% strength for percent parameter is recommended.
unsharp_mask_home = home_png.filter(ImageFilter.UnsharpMask(radius=2, percent=150, threshold=3))
unsharp_mask_kalam = dr_kalam.filter(ImageFilter.UnsharpMask(radius=2, percent=150, threshold=3))

display.display(unsharp_mask_home, unsharp_mask_kalam)

unsharp_mask_home = home_png.filter(ImageFilter.UnsharpMask(radius=1, percent=100, threshold=5))
unsharp_mask_kalam = dr_kalam.filter(ImageFilter.UnsharpMask(radius=1, percent=100, threshold=5))

display.display(unsharp_mask_home, unsharp_mask_kalam)

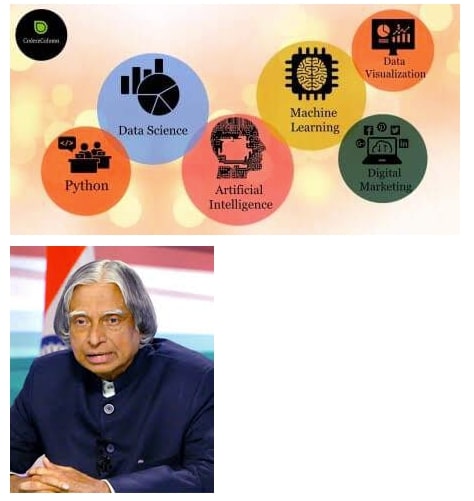
Kernel Filter
Kernel filter is a parameterized filter that let us convolve kernel of a particular size on our image. It has the below-mentioned parameters that can be tweaked for different results.
- size - This parameter accepts tuple (width, height) specifying the size of the kernel that will be applied to an image.
- kernel - This parameter accepts array of size width x height specifying weights for kernel.
- scale - This parameter accepts float value. If given the multiplication result of kernel weights and the original image will be divided by this value. Default is None.
- offset - This parameter accepts float value. If given, this value will be added after the scale parameter value is applied to pixel results.
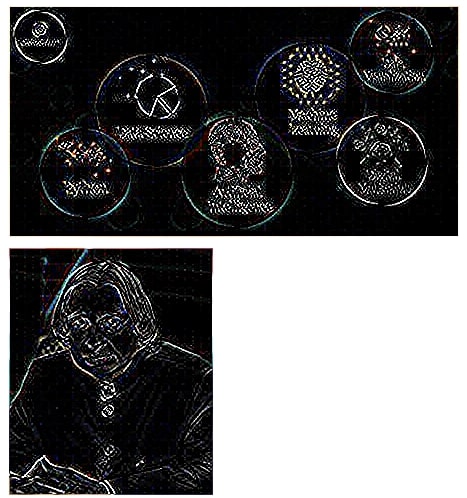
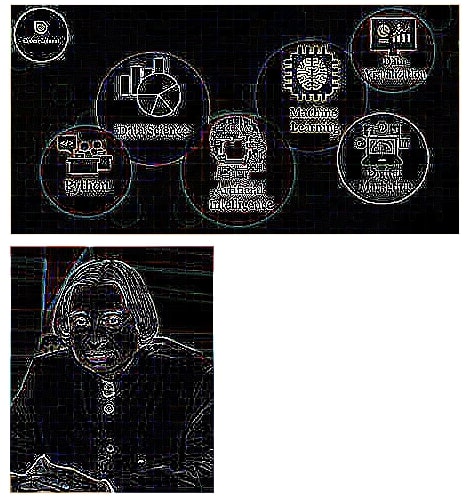
Below we have applied kernel with different weights on our images. We have also applied a few edge detection filters to our images. Please feel free to check this wikipedia) page which has information about kernel filtering.
import numpy as np

kernel = np.array([[0,0,0],
                   [0,1,0],
                   [0,0,0]])

kernel_home = home_png.filter(ImageFilter.Kernel(size=(3,3), kernel=kernel.flatten()))
kernel_kalam = dr_kalam.filter(ImageFilter.Kernel(size=(3,3), kernel=kernel.flatten()))

display.display(kernel_home, kernel_kalam)
import numpy as np

edge_detector = np.array([[1,0,-1],
                          [0,0,0],
                          [-1,0,1]])

kernel_home = home_png.filter(ImageFilter.Kernel(size=(3,3), kernel=edge_detector.flatten(), scale=0.2))
kernel_kalam = dr_kalam.filter(ImageFilter.Kernel(size=(3,3), kernel=edge_detector.flatten(), scale=0.2))

display.display(kernel_home, kernel_kalam)
import numpy as np

edge_detector = np.array([[0,-1,0],
                          [-1,4,-1],
                          [0,-1,0]])

kernel_home = home_png.filter(ImageFilter.Kernel(size=(3,3), kernel=edge_detector.flatten(), scale=0.2))
kernel_kalam = dr_kalam.filter(ImageFilter.Kernel(size=(3,3), kernel=edge_detector.flatten(), scale=0.2))

display.display(kernel_home, kernel_kalam)
import numpy as np

edge_detector = np.array([[-1,-1,-1],
                          [-1, 8,-1],
                          [-1,-1,-1]])

kernel_home = home_png.filter(ImageFilter.Kernel(size=(3,3), kernel=edge_detector.flatten(), scale=0.2))
kernel_kalam = dr_kalam.filter(ImageFilter.Kernel(size=(3,3), kernel=edge_detector.flatten(), scale=0.2))

display.display(kernel_home, kernel_kalam)
RankFilter
RankFilter sorts all neighboring pixels of a particular pixel and then takes pixel specified by particular rank as final pixel value when convolving. RankFilter is a parameterized filter and has the below-mentioned parameters.
- size - It accepts integer value specifying kernel size.
- rank - It accepts integer value in the range
(0- size*size-1). That pixel will be selected as the final value when convolving.
Below we have applied a rank filter with different parameter values to our images.
rank_home = home_png.filter(ImageFilter.RankFilter(size=3, rank=0))
rank_kalam = dr_kalam.filter(ImageFilter.RankFilter(size=3, rank=0))

display.display(rank_home, rank_kalam)

rank_home = home_png.filter(ImageFilter.RankFilter(size=3, rank=4))
rank_kalam = dr_kalam.filter(ImageFilter.RankFilter(size=3, rank=4))

display.display(rank_home, rank_kalam)

rank_home = home_png.filter(ImageFilter.RankFilter(size=3, rank=8))
rank_kalam = dr_kalam.filter(ImageFilter.RankFilter(size=3, rank=8))

display.display(rank_home, rank_kalam)

MedianFilter
MedianFilter is another kind of rank filter where we select the median pixel value of sorted pixel values of the window of a particular size. It's a parameterize filter and has only one parameter named size which accepts integer value specifying window size.
median_home = home_png.filter(ImageFilter.MedianFilter(size=3))
median_kalam = dr_kalam.filter(ImageFilter.MedianFilter(size=3))

display.display(median_home, median_kalam)

median_home = home_png.filter(ImageFilter.MedianFilter(size=5))
median_kalam = dr_kalam.filter(ImageFilter.MedianFilter(size=5))

display.display(median_home, median_kalam)

MinFilter
MinFilter is another kind of rank filter where we select the min pixel value of sorted pixel values of the window of a particular size. It's a parameterize filter and has only one parameter named size which accepts integer value specifying window size.
min_home = home_png.filter(ImageFilter.MinFilter(size=3))
min_kalam = dr_kalam.filter(ImageFilter.MinFilter(size=3))

display.display(min_home, min_kalam)
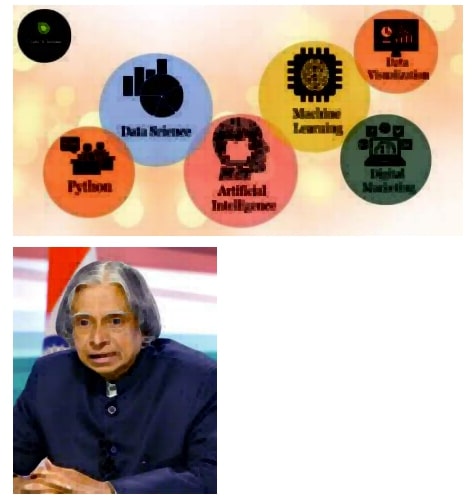
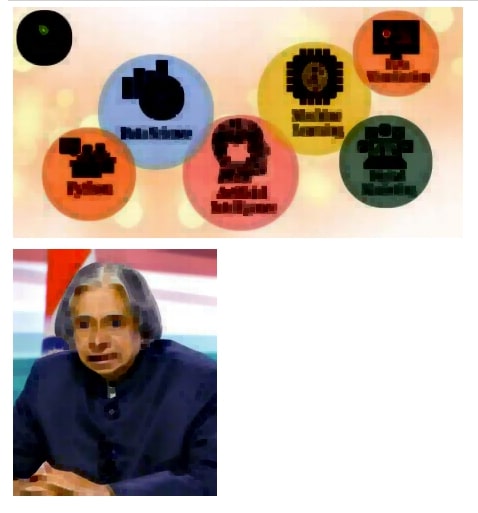
min_home = home_png.filter(ImageFilter.MinFilter(size=5))
min_kalam = dr_kalam.filter(ImageFilter.MinFilter(size=5))

display.display(min_home, min_kalam)
MaxFilter
MaxFilter is another kind of rank filter where we select max pixel value of sorted pixel values of the window of a particular size. It's a parameterize filter and has only one parameter named size which accepts integer value specifying window size.
max_home = home_png.filter(ImageFilter.MaxFilter(size=3))
max_kalam = dr_kalam.filter(ImageFilter.MaxFilter(size=3))

display.display(max_home, max_kalam)

max_home = home_png.filter(ImageFilter.MaxFilter(size=5))
max_kalam = dr_kalam.filter(ImageFilter.MaxFilter(size=5))

display.display(max_home, max_kalam)

 Sunny Solanki
![YouTube Subscribe]() Comfortable Learning through Video Tutorials?
Comfortable Learning through Video Tutorials?
If you are more comfortable learning through video tutorials then we would recommend that you subscribe to our YouTube channel.
![Need Help]() Stuck Somewhere? Need Help with Coding? Have Doubts About the Topic/Code?
Stuck Somewhere? Need Help with Coding? Have Doubts About the Topic/Code?
When going through coding examples, it's quite common to have doubts and errors.
If you have doubts about some code examples or are stuck somewhere when trying our code, send us an email at coderzcolumn07@gmail.com. We'll help you or point you in the direction where you can find a solution to your problem.
You can even send us a mail if you are trying something new and need guidance regarding coding. We'll try to respond as soon as possible.
![Share Views]() Want to Share Your Views? Have Any Suggestions?
Want to Share Your Views? Have Any Suggestions?
If you want to
- provide some suggestions on topic
- share your views
- include some details in tutorial
- suggest some new topics on which we should create tutorials/blogs


 Comfortable Learning through Video Tutorials?
 Stuck Somewhere? Need Help with Coding? Have Doubts About the Topic/Code?
 Want to Share Your Views? Have Any Suggestions?
 filters, pillow