Pillow: Python Imaging Library
What is PIL (Python Imaging Library)?
Python Imaging Library is used for loading images in memory and doing various transformations on the image. It supports loading images of various types like PNG, JPEG, etc. It can be used to do various transformations on image and then store that transformed image. PIL is generally used in deep learning where preprocessing of images is required as part of object detection tasks. Image loaded using PIL can be easily converted to Numpy array as many Machine Learning and Deep Learning libraries take numpy array as input. Various deep learning libraries use PIL behind the scene to do image pre-processing.
How to install PIL?
- pip install Pillow
Note: This tutorial is inspired by Pillow Tutorial
Importing PIL and using it for image manipulation
import PIL
from PIL import Image, ImageFilter, ImageEnhance, ImageSequence
import numpy as np
import secrets
import matplotlib.pyplot as plt

np.set_printoptions(precision=4,threshold=5,edgeitems=2)
Loading an image in memory.
Image is the main class of PIL which is responsible for representing an image. Whenever you load an image in memory using PIL it'll be of class Image.
open() method is used to open a file. This method loads file lazily as it reads the header of an image file to find out image format, mode, and size. It does not load the whole image into memory which can be of few MB for images with higher resolution. This can be helpful to find out image metadata without loading it in memory.
Note: Please save a few png, jpeg images in a directory where jupyter notebook is kept to load images in memory and do various operations. Also, change the image name according to the below code to load your images.
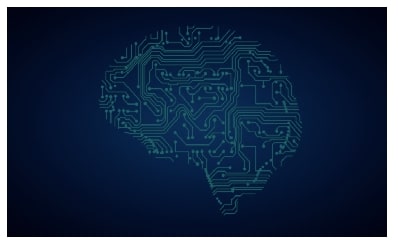
Image.open('ml.jpeg')

img = Image.open('ml1.png').resize((380,250)); img2 = Image.open('ml.jpeg').resize((380,250))
type(img), type(img2)
sizeattribute of Image instance refers to the size of the image in pixels.(width, height)modeattribute refers to in which mode image is loaded which is generally RGB, RGBA, CMYK, L, etc. One can get more information about mode, pallette, bands, etc over hereformatrefers to the format of the source file from which image was loaded, It'll beNonefor an image generated after processing an original image. One can read about formats supported over here
(img.size,img.mode, img.format, img.info), (img2.size,img2.mode, img2.format, img2.info)
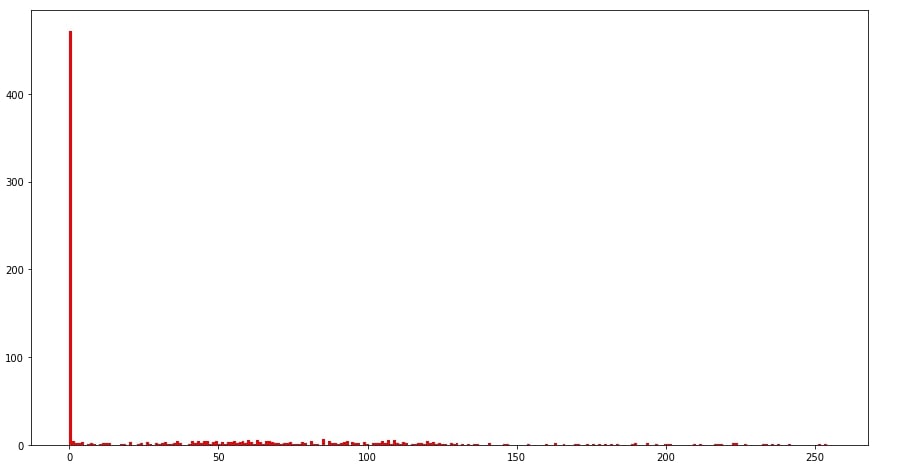
plt.figure(figsize=(15,8))
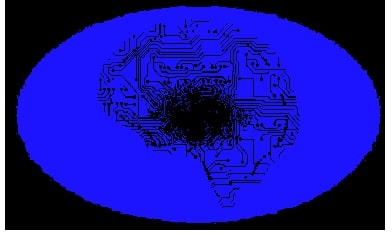
plt.hist(img.histogram(),bins=256,range=(0,255),color='red', label='Density of pixels within image')
show()function saves the image and then loads it in default image application on the machine.convert()function is used to convert an image from one mode to another. Currently conversion only between images with mode types 'L', 'RGB' and 'CMYK'
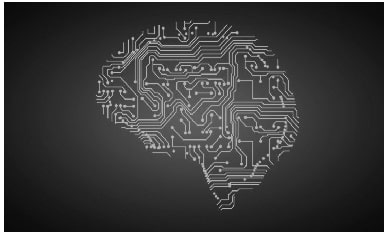
img = img.convert('L')
img.show()
Save image using Image class instance method save()
- It's required to provide the file format in which to save the file. We can give format as a parameter to
save()method or we can include it in the filename as well.save()method will fail if the format is not provided as part of a file name or as format parameter.
img.save('img_rgb.jpg'); img.save('temp',format="jpeg")
Creating thumbnail
- We can use
thumbnail()method of Image class to create thumbnail from an image. We need to provide a size parameter as a tuple (height, width).PIL will create an image that has the same aspect ratio as the original image. The resulting thumbnail will not be the same size as you provided as parameter. But it'll not be larger than that size. - Also make a note that
thumbnail()method worksin-placewhich means that it'll modify original image object rather than returning a new modified object. - one can use
sizeattribute of Image class to check the size of the resulting image after converting to thumbnail. sizeattribute of Image class always returns tuple in format (width, height).
img.thumbnail((128,128))
img.size
Resizing Image
resize() method is used to resize the method. It requires a new size of an image as a tuple first parameter. One can maximize and minimize image using this method.
img = Image.open('ml1.png').resize((380,250))
img.resize((200,150))

Cropping Image
crop() method is used to crop a particular part of an image. It requires a tuple of 4 integers (left, upper, right, lower). This number must be within a range of size of image otherwise error will be raised while cropping. Image is represented using a coordinated system with (0,0) as upper-left corner and (width, height) as a lower-right corner.
crop() method is lazy as it does not actually crop image until load() function is called to load a cropped image.
- One can find width and height of resulting image using below formula:
- width = right - left, height = lower - upper.
size attribute of Image class always returns tuple in format (width, height).
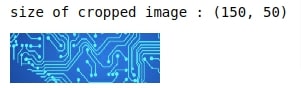
cropped_img = img.crop((100,100,250,150))
print('size of cropped image : %s'%str(cropped_img.size))
cropped_img
Flip/Rotate an Image
transpose()function is used to flip/rotate image in various angles. Various flip/rotate types are Image.FLIP_LEFT_RIGHT, Image.FLIP_TOP_BOTTOM, Image.ROTATE_180, Image.ROTATE_90, Image.ROTATE_270, Image.TRANSPOSE and Image.TRANSVERSErotate()function is used to rotate the image by certain degrees. It takes on a parameter which must be between (0,360).
img.transpose(Image.FLIP_TOP_BOTTOM)

img.rotate(45)

Converting Image object to numpy array and vice-versa
We can directly give Image class instance as input to
numpy.array()method. It'll convert image to numpy array based on mode and it'll create channels accordingly.We can create Image instance from numpy array again with
Image.fromarray()function.
nparr = np.array(img)
nparr.shape, nparr.dtype, nparr
((250, 380, 4), dtype('uint8'), array([[[  4,   6,  44, 255],
         [  4,   6,  44, 255],
         ...,
         [  6,   8,  47, 255],
         [  6,   8,  47, 255]],

        [[  5,   7,  45, 255],
         [  5,   7,  45, 255],
         ...,
         [  6,   8,  47, 255],
         [  6,   8,  47, 255]],

        ...,

        [[  4,   7,  42, 255],
         [  4,   7,  42, 255],
         ...,
         [  5,   7,  45, 255],
         [  5,   7,  46, 255]],

        [[  3,   6,  41, 255],
         [  3,   6,  41, 255],
         ...,
         [  5,   7,  45, 255],
         [  5,   7,  46, 255]]], dtype=uint8))
img2 = Image.fromarray(nparr); Image.fromarray(nparr)

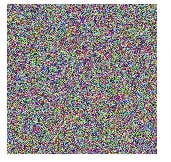
Image.fromarray(np.random.randint(0,255,size=(150, 150, 3), dtype=np.uint8))
Create image from bytes and vice-versa.
frombytes()function allows us to create an image from a byte stream.- We need to specify the mode, size of image and data.
- Please make a note that for RGB, RGBA modes, image data should be provided for all channels but size will be (width, height) only.
tobytes()function is used to create a byte stream from an image.
Image.frombytes('L', size=(100,100), data = secrets.token_bytes(10000))
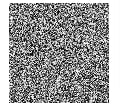
Image.frombytes('RGB', size=(100,100), data = secrets.token_bytes(30000))
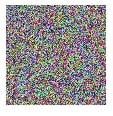
Image.frombytes('RGBA', size=(100,100), data = secrets.token_bytes(40000));
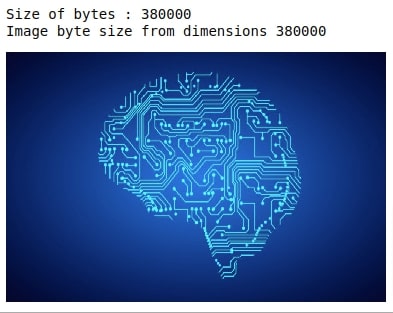
byte_stream = img.tobytes()
print('Size of bytes : %d'%len(byte_stream))
print('Image byte size from dimensions %d'%(img.size[0]*img.size[1]*len(img.getbands())))
Image.frombytes(img.mode, img.size, byte_stream)
Splitting image into bands and merging bands in various order
split()method is used to split methods into bands which will (R,G,B) for RGB, (R,G,B,A) for RGBA, (C,M,Y,K) for CMYK and (L,) for L (Luminescence). Each of the bands returned itself will be an instance of Image class again so it makes easy to work on parts and then combine again.merge()is used to merge different bands and create one unified image of those bands. It takes the first parameter asmodeand the second parameter astuplecontainingbandsaccording to mode.bandsmust have the same size in order for a merge to work correctly.
img =img.convert('RGB')
r, g, b = img.split()
Image.merge('L', (b,))
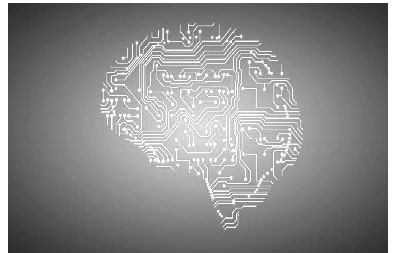
Image.merge('RGBA', (r, g, b, b))

Image.merge('RGB', (b, r, g))

Pasting images into another image
paste()method is used to paste cropped image/image to another image.- User needs to provide
placewhere to paste the image with a tuple (left, upper, right, lower). Users can only provide (left, upper) as well for place and it'll work fine. - One can also use
maskwhich can be used to make pasted images withtransparency. The masked image will have values between (0, 255) with 0 values being totally transparent and 255 is opaque. - One can use this function to create a collage.
img = Image.open('ml1.png').resize((380,230))
cropped_region = img.crop((100,100,150,150))
img.paste(cropped_region,box=(10,10,60,60))
img.paste(cropped_region,box=(20,70,70,120),mask=Image.fromarray((np.zeros(cropped_region.size)+120).astype(np.uint8)))
img.paste(cropped_region,box=(100,150,150,200),mask=Image.fromarray((np.zeros(cropped_region.size)+200).astype(np.uint8)))
img

Applying various filters on image for effects
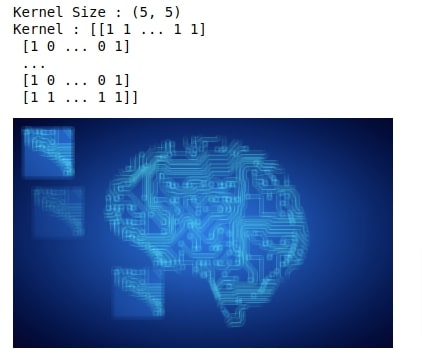
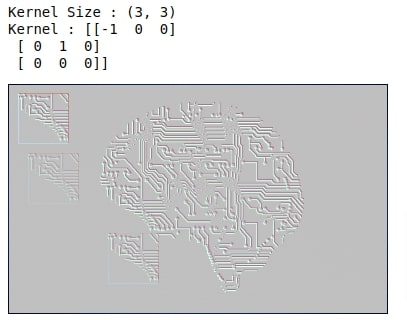
filter()method is used to apply various filters on an image like a blur, smooth, emboss, etc. It accepts one argument which is a filter. The filter is from classImageFilter.- All effects generate by doing convolution operation on the image.Read about convolution to get idea about it.
- All effects have (3,3) or (5,5) kernel which gets convolved on the image. Kernel refers to an array of that size.
kernel_size = ImageFilter.BLUR.filterargs[0]
print('Kernel Size : %s'%str(kernel_size))
print('Kernel : %s'%str(np.array(ImageFilter.BLUR.filterargs[3]).reshape(kernel_size)))
img.filter(ImageFilter.BLUR)
kernel_size = ImageFilter.EMBOSS.filterargs[0]
print('Kernel Size : %s'%str(kernel_size))
print('Kernel : %s'%str(np.array(ImageFilter.EMBOSS.filterargs[3]).reshape(kernel_size)))
img.filter(ImageFilter.EMBOSS)
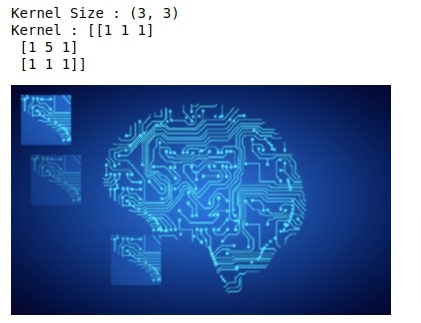
kernel_size = ImageFilter.SMOOTH.filterargs[0]
print('Kernel Size : %s'%str(kernel_size))
print('Kernel : %s'%str(np.array(ImageFilter.SMOOTH.filterargs[3]).reshape(kernel_size)))
img.filter(ImageFilter.SMOOTH)
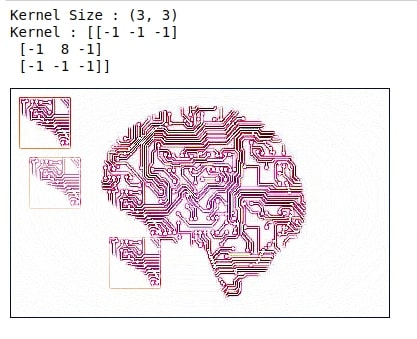
kernel_size = ImageFilter.CONTOUR.filterargs[0]
print('Kernel Size : %s'%str(kernel_size))
print('Kernel : %s'%str(np.array(ImageFilter.CONTOUR.filterargs[3]).reshape(kernel_size)))
img.filter(ImageFilter.CONTOUR)
Manipulating individual pixels of image
point()function is used to manipulate individual pixels of an image. It takes as input function which takes 1 argument which is pixel value.One can work on individual bands of image and then combine bands to generate a combined image.
img.point(lambda x: 0 if x < 120 else 255)
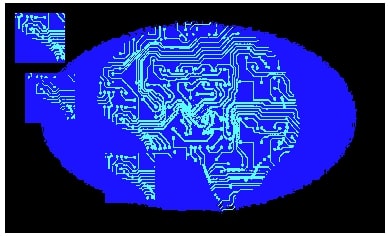
img = Image.open('ml1.png').resize((380,230))
bands = list(img.split())[:-1]

bands[0] = bands[0].point(lambda x: x > 120 and 0)
bands[1] = bands[1].point(lambda x: x < 120 and 0)
bands[2] = bands[2].point(lambda x: x > 100 and x < 200 and 255)
Image.merge('RGB',bands)
Enhance image by changing contrast/brightness/color balance/ sharpness
ImageEnhanceclass has various functionalities(Brightness, Color, Contrast, Sharpness) which allows user to enhance an image in various ways- All of them take
Imageinstance as input and returns an instance of effect. - Returned effect instance has a method called
enhance()which takes float value between [0.0, 1.0] to represent percent application of the effect. - Value of 0.0 for Color effect returns a black and white image.
img = Image.open('ml1.png').resize((380,230))
img = ImageEnhance.Brightness(img)
print(type(img))
img.enhance(0.4)
img = Image.open('ml1.png').resize((380,230))
img = ImageEnhance.Color(img)
img.enhance(0.0)
img = Image.open('ml1.png').resize((380,230))
img = ImageEnhance.Contrast(img)
img.enhance(0.6)

img = Image.open('ml1.png').resize((380,230))
img = ImageEnhance.Sharpness(img)
img.enhance(2.0)

Roll Image (Horizontally/ Vertically)
The below method rolls image horizontally / vertically by providing pixel values between x-range for Horizontal and y-range for Vertical.
If load() was not called, then the crop operation would not be performed until the images were used in the paste commands. This would mean that part1 would be cropped from the version of the image already modified by the first paste.
def roll_image(img, roll_type='horizontal', delta = 1):
    x , y = img.size
    if roll_type=='horizontal':
        part1 = img.crop((0,0, delta, y ))
        part2 = img.crop((delta, 0, x, y))
    else:
        part1 = img.crop((0, 0, x, delta ))
        part2 = img.crop((0, delta, x, y))

    part1.load()
    part2.load()

    img.paste(part2)
    img.paste(part1, box = (x-delta, 0) if roll_type=='horizontal' else (0, y-delta))
    return img
img = Image.open('ml1.png').resize((380,230))
roll_image(img,delta=200)

img = Image.open('ml1.png').resize((380,230))
roll_image(img, roll_type='vertical' ,delta=100)

Lightening Image
img = Image.open('ml1.png').resize((380,230))
def lighten_image(img, delta):
    if delta >=0 and delta <=255:
        white_image = Image.fromarray(np.zeros((img.size[1],img.size[0]),dtype=np.uint8)+255)
        mask = Image.fromarray(np.zeros((img.size[1],img.size[0]),dtype=np.uint8)+delta)
        #print(mask.size, white_image.size,img.size)
        img.paste(white_image,mask=mask)
    else:
        print('please enter values between 0-255')
    return img
lighten_image(img,40)

from PIL import Image
from PIL import PSDraw

im = Image.open("ml.png")
title = "ml"
box = (1*72, 2*72, 7*72, 10*72) # in points

ps = PSDraw.PSDraw() # default is sys.stdout
ps.begin_document(title)

# draw the image (75 dpi)
ps.image(box, im, 75)
ps.rectangle(box)

# draw title
ps.setfont("HelveticaNarrow-Bold", 36)
ps.text((3*72, 4*72), title)

ps.end_document()
 Sunny Solanki
Sunny Solanki
Intro: Software Developer | Youtuber | Bonsai Enthusiast
About: Sunny Solanki holds a bachelor's degree in Information Technology (2006-2010) from L.D. College of Engineering. Post completion of his graduation, he has 8.5+ years of experience (2011-2019) in the IT Industry (TCS). His IT experience involves working on Python & Java Projects with US/Canada banking clients. Since 2020, he’s primarily concentrating on growing CoderzColumn.
His main areas of interest are AI, Machine Learning, Data Visualization, and Concurrent Programming. He has good hands-on with Python and its ecosystem libraries.
Apart from his tech life, he prefers reading biographies and autobiographies. And yes, he spends his leisure time taking care of his plants and a few pre-Bonsai trees.
Contact: sunny.2309@yahoo.in


![YouTube Subscribe]() Comfortable Learning through Video Tutorials?
Comfortable Learning through Video Tutorials?
If you are more comfortable learning through video tutorials then we would recommend that you subscribe to our YouTube channel.
![Need Help]() Stuck Somewhere? Need Help with Coding? Have Doubts About the Topic/Code?
Stuck Somewhere? Need Help with Coding? Have Doubts About the Topic/Code?
 Stuck Somewhere? Need Help with Coding? Have Doubts About the Topic/Code?
When going through coding examples, it's quite common to have doubts and errors.
If you have doubts about some code examples or are stuck somewhere when trying our code, send us an email at coderzcolumn07@gmail.com. We'll help you or point you in the direction where you can find a solution to your problem.
You can even send us a mail if you are trying something new and need guidance regarding coding. We'll try to respond as soon as possible.
![Share Views]() Want to Share Your Views? Have Any Suggestions?
Want to Share Your Views? Have Any Suggestions?
 Want to Share Your Views? Have Any Suggestions?
If you want to
- provide some suggestions on topic
- share your views
- include some details in tutorial
- suggest some new topics on which we should create tutorials/blogs
 python, imagemanipulation